If you like that classic, old-school chocolate pudding texture — this one’s for the win: smooth, shiny and deeply chocolaty with no fuss. It’s rustic, one-saucepan dessert that can somehow seem fancy in small little cups and is ideal for a quick weeknight treat or an easily made-ahead sweet for guests.

Why You’ll Love These Creamy Chocolate Pudding Cups
- Rich cocoa + actual dark chocolate flavor
- Silky, creamy texture without eggs
- One saucepan, minimal cleanup
- Make-ahead friendly (great for entertaining)
- Easy to scale up for a crowd
Ingredients
Stovetop pudding base
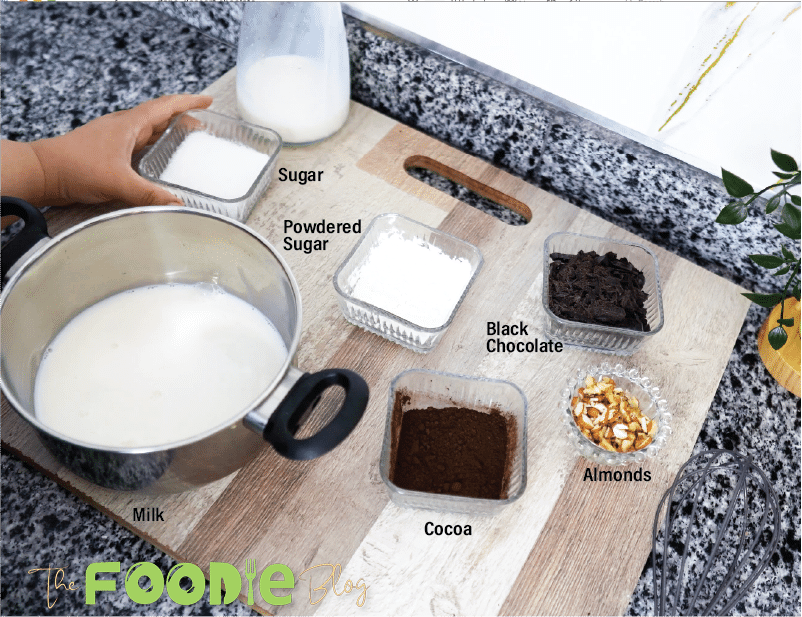
- 2 cups + 2 Tbsp (500 mL) whole milk
- 1/3 cup (60 g) granulated sugar
- Cornstarch (Maizena): 1/4 cup (30 g)
- Cocoa powder, unsweetened: 1/2 cup (40 grams)
- Chopped dark chocolate: 2 oz (60 g) (I used about 55% cacao)
Topping (optional)
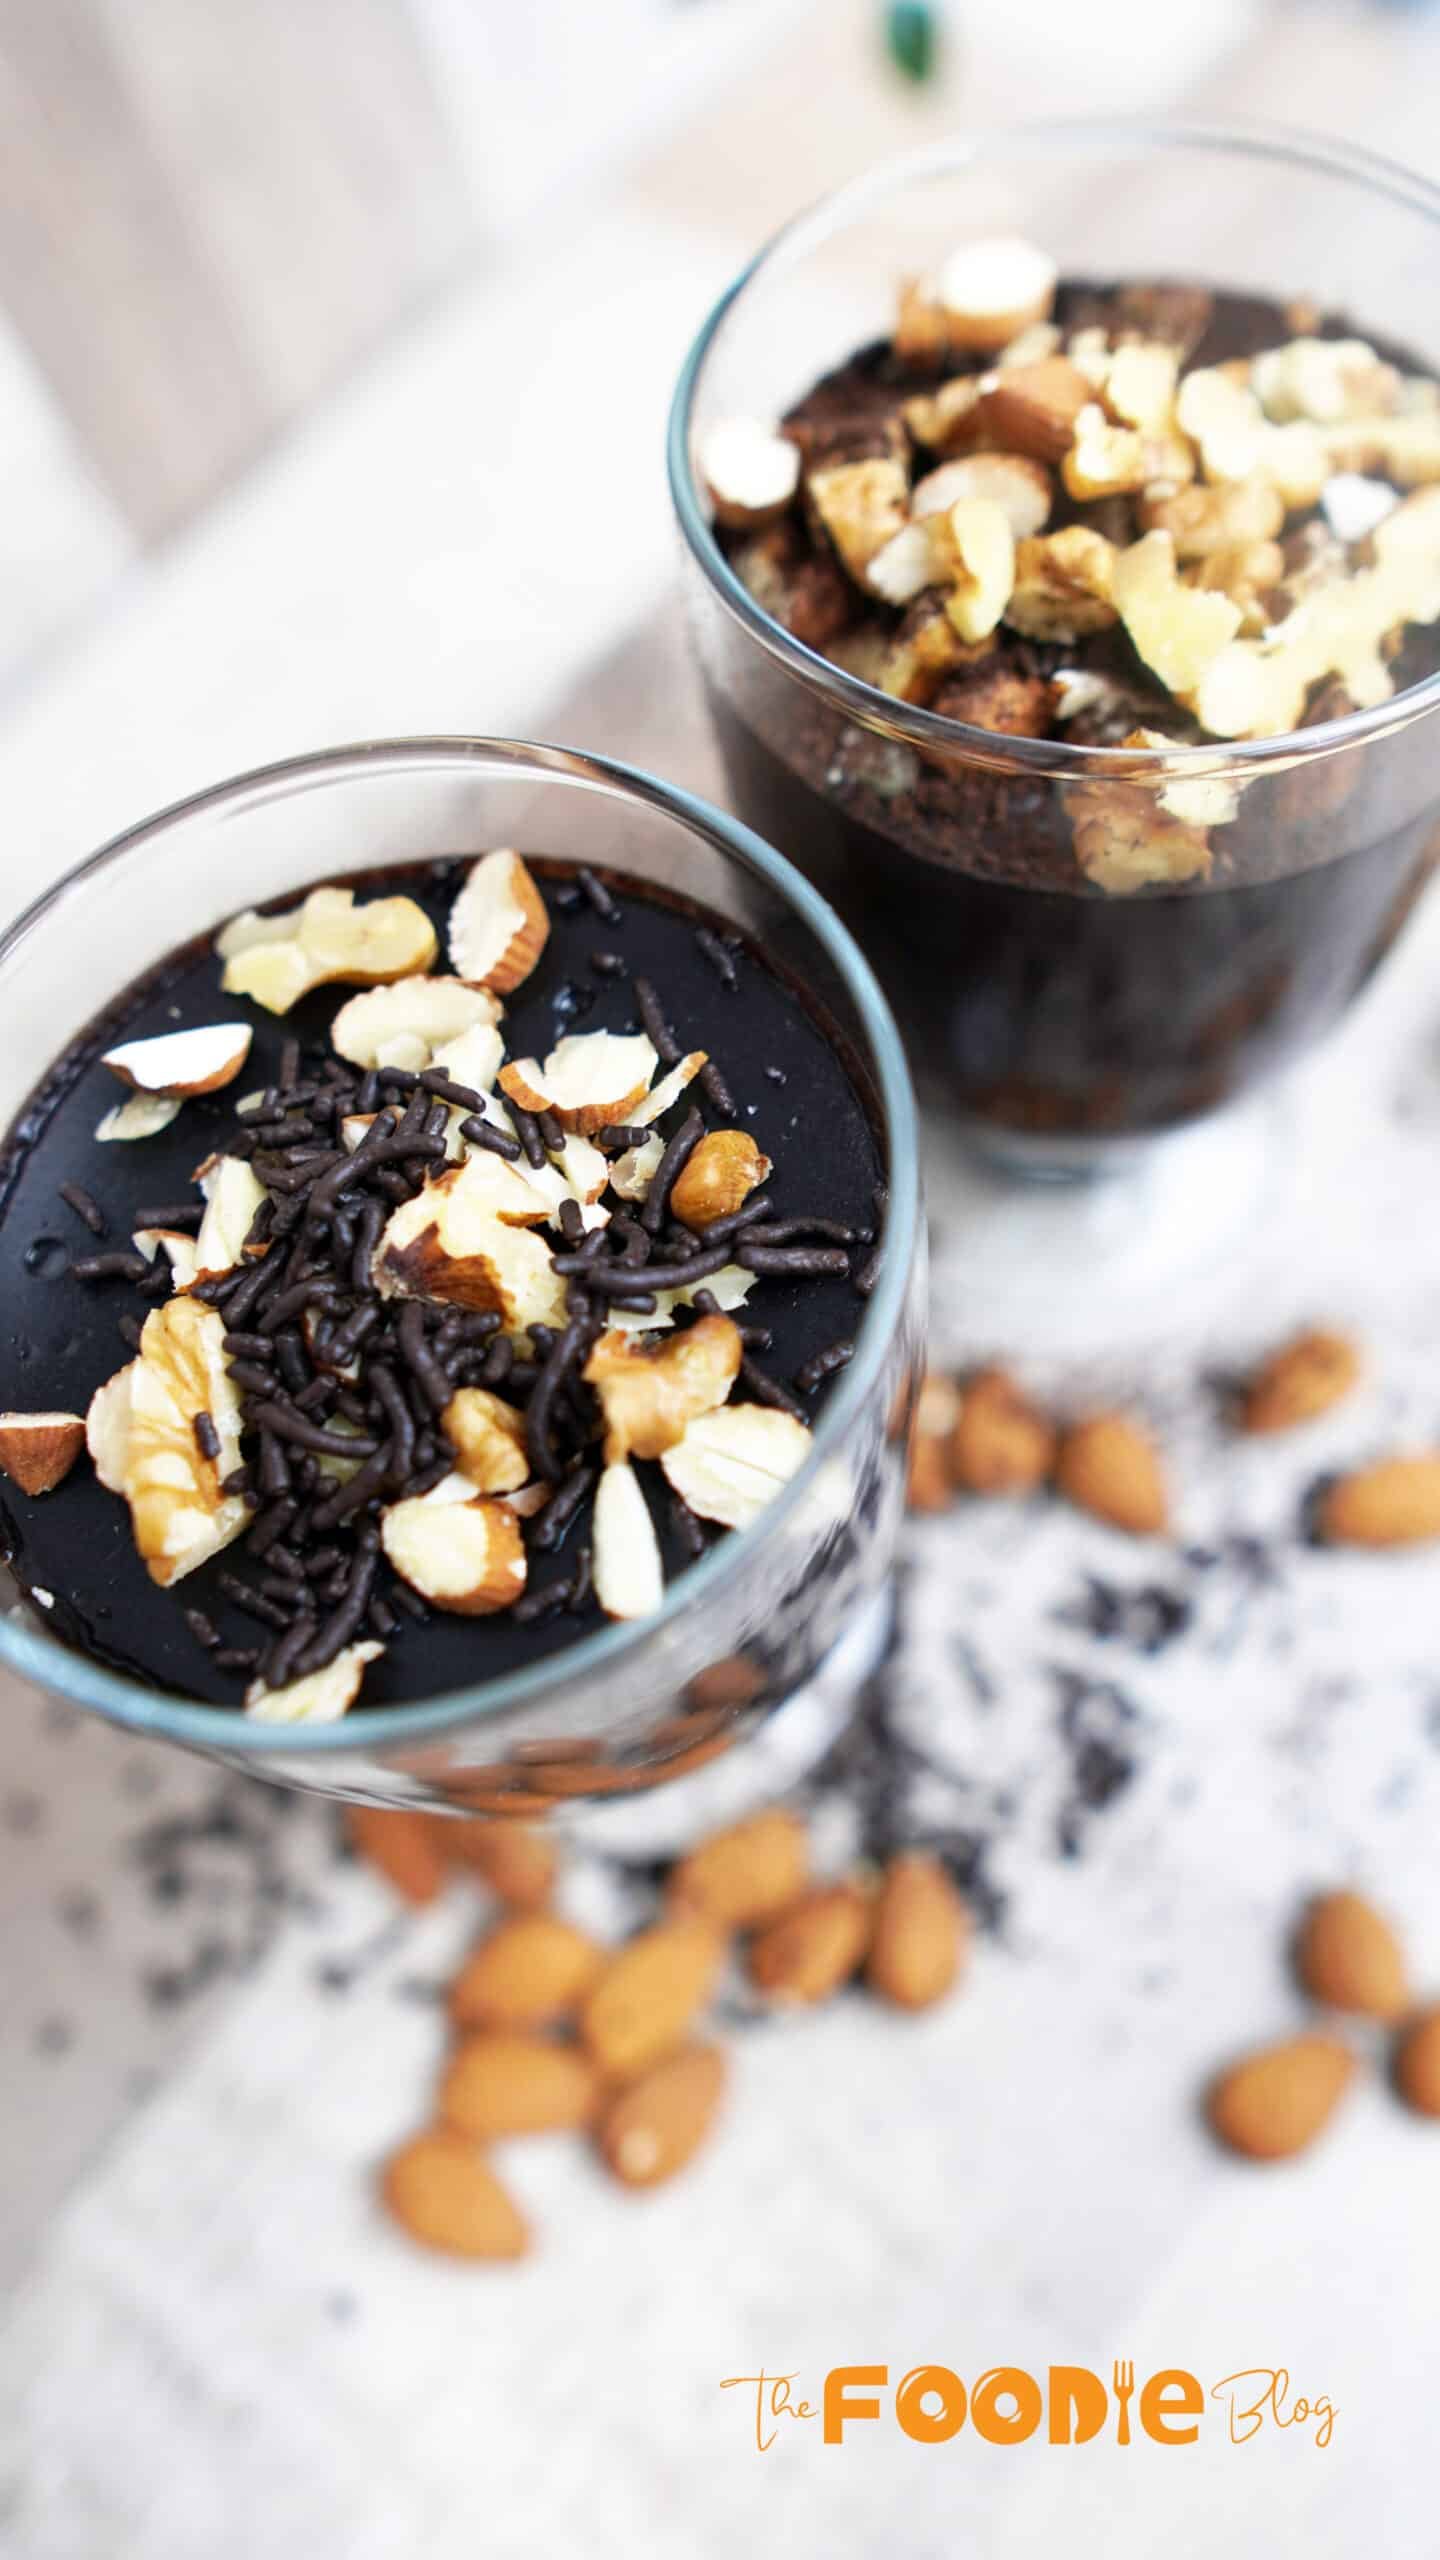
- Chopped walnuts: 2 tablespoons or so (20 g)
Ingredient Notes and Substitutions
Milk: Whole milk will produce the richest pudding, while 2-percent and skim will also work. You can go with 2% for somewhat lighter results. For dairy-free, it’s the full-fat oat milk (may come with a little softer texture).
Cornstarch: That’s how the pudding gets thick. Arrowroot will be okay, but it acts differently and may require some tweaking.
Cocoa powder: Use unsweetened cocoa. Dutch-process is O.K., and will make the color darker.
Dark chocolate: Do not use anything less than 60–70% for a stronger (less sweet) chocolate flavor. Semi-sweet works too.
Walnuts: Substitute toasted almonds or hazelnuts, or omit the nuts entirely.
How to Make Creamy Chocolate Pudding Cups Step by Step
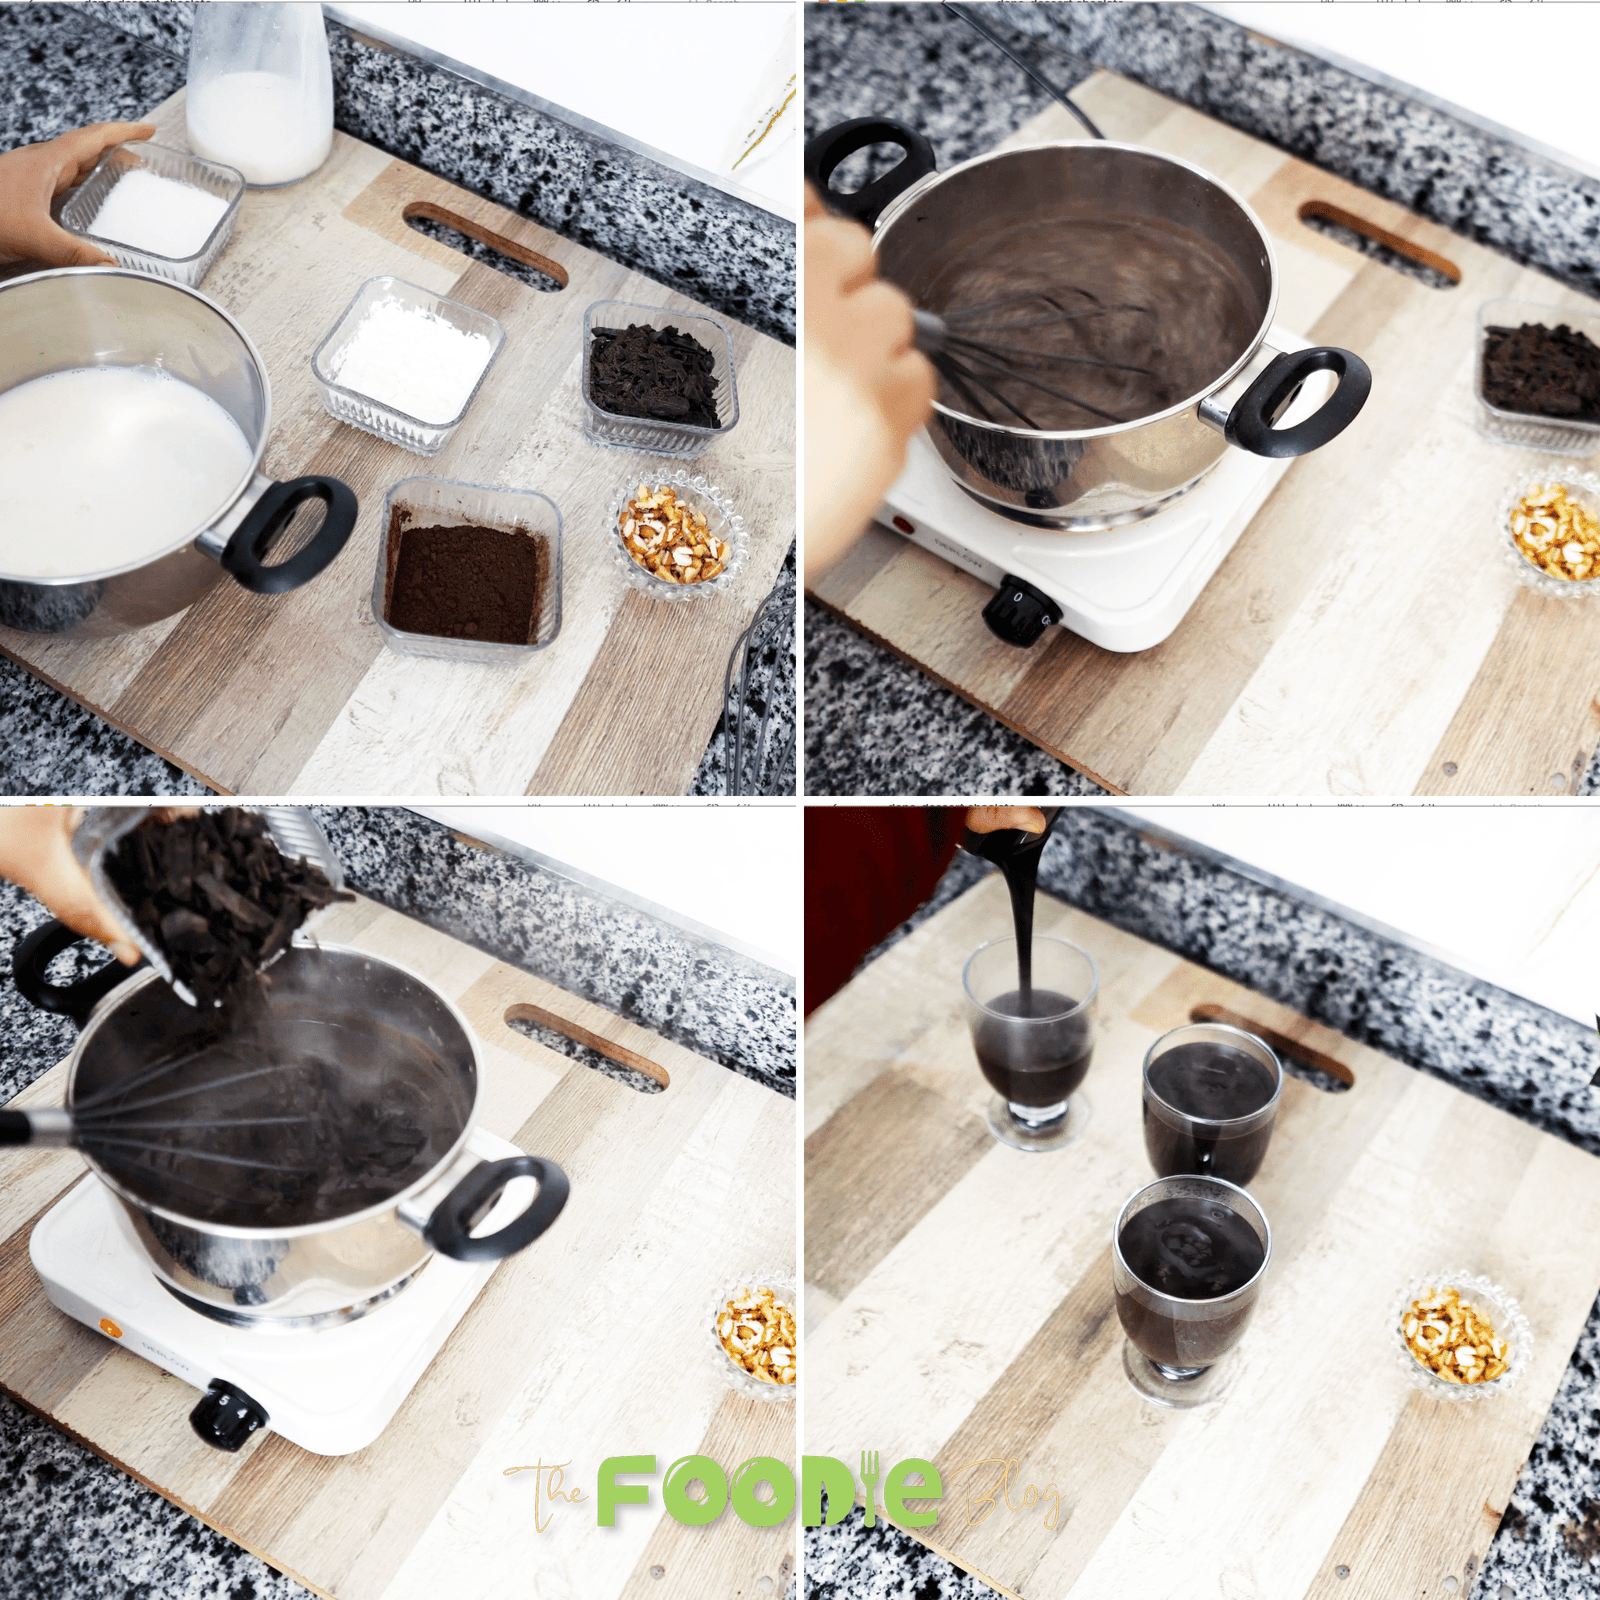
Mix the dry ingredients.
In a medium saucepan (off heat), whisk together sugar, cornstarch and cocoa powder until well blended.
Add milk gradually.
Continue to whisk, adding the milk very slowly so there are no lumps. Whisk until completely smooth.
Cook until thick.
Place over medium heat and stir constantly until thickened. In few minutes it thickens slightly. The moment it begins to get grease bubbling whip vigorously 30–60 seconds until glossy and fat.
Melt in the chocolate.
Remove from heat. Stir in the chopped dark chocolate and set aside to melt completely.
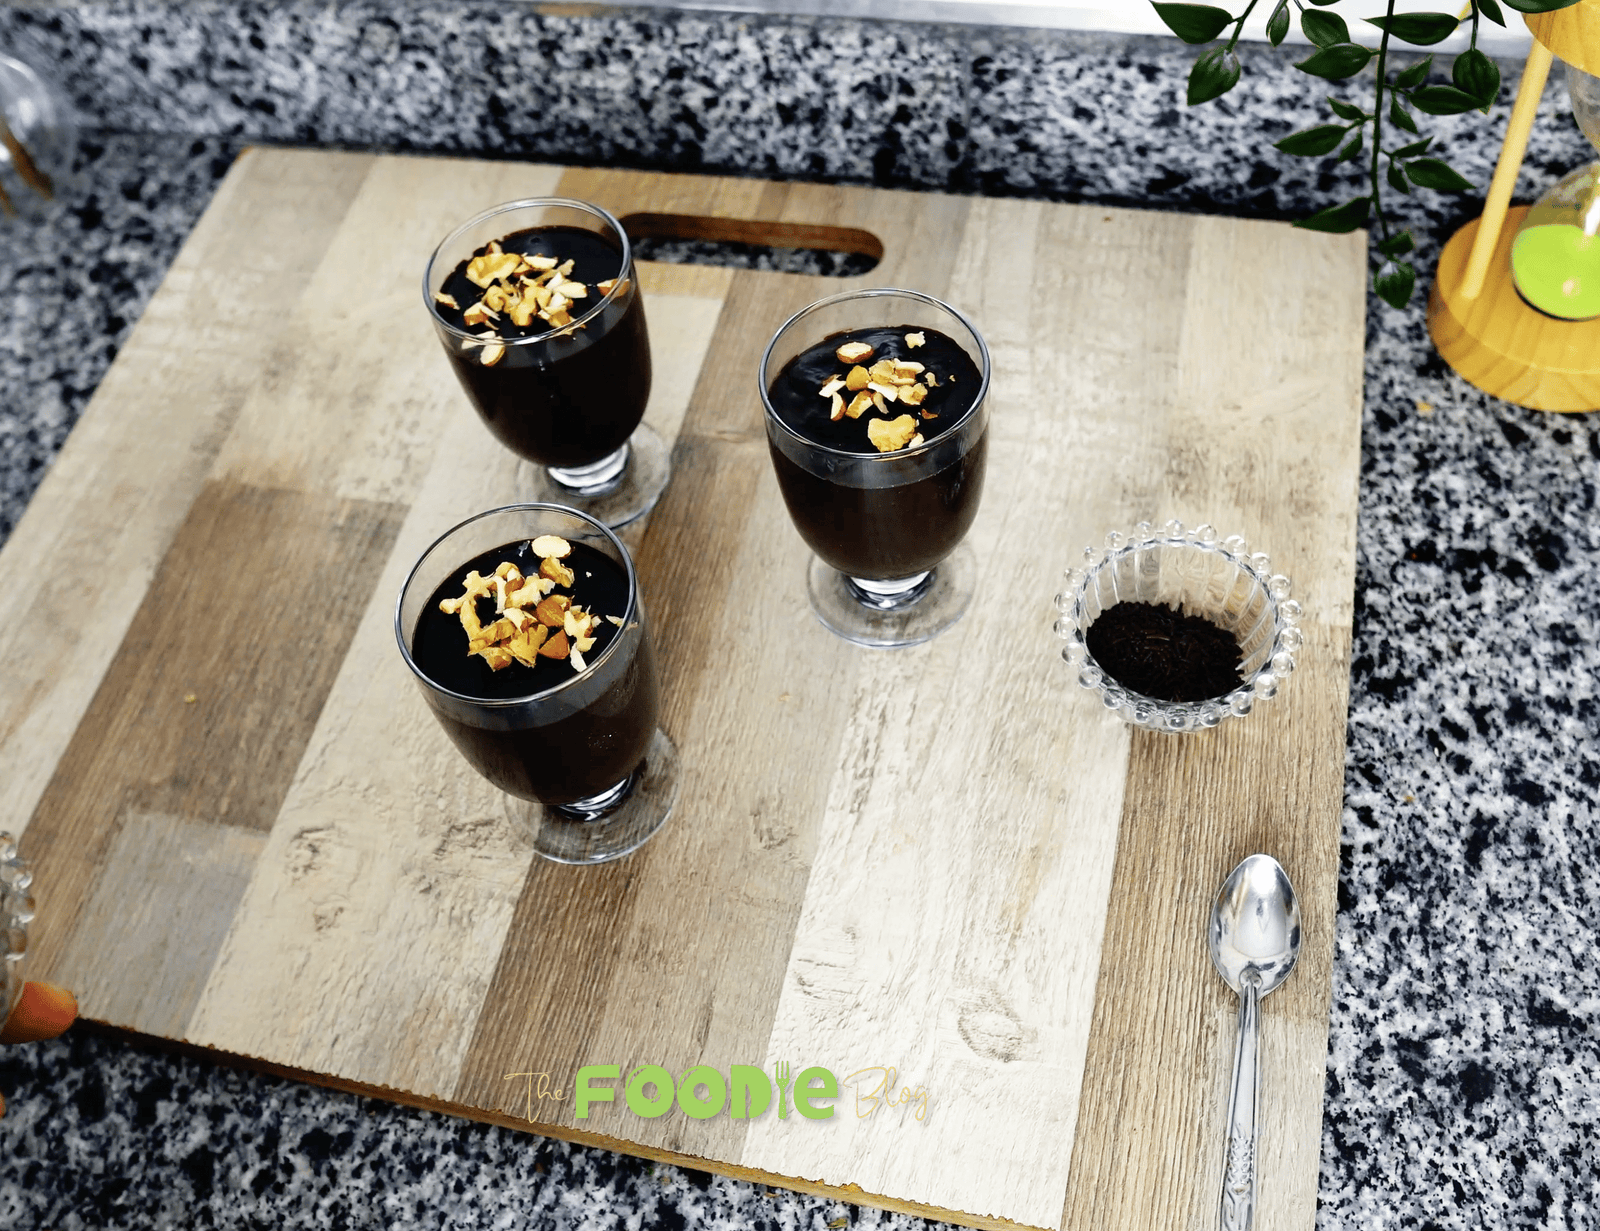
Portion into cups.
Divide the pudding into servings cups, or 3 as shown here.
Prevent skin.
Lay a piece of plastic wrap directly on top of the surface of each pudding cup, touching the pudding.
Chill to set.
Refrigerate until completely chilled and set, at least 2 hours.
Finish and serve.
Sprinkle with chopped walnuts (if using) and serve cold.
Tips for Smooth, Lump-Free Creamy Chocolate Pudding Cups
- Whisk the dry ingredients incredibly well first to get that cornstarch pretty evenly dispersed (it serves as a preventative against clumps here).
- Start by pouring the milk in gradually, whisking all the while.
- Don’t leave it alone once it has warmed up — pudding thickens quickly.
- If you have very small lumps, strain it through a fine-mesh sieve before chilling.
- Scrape the bottom edges of the pot as you whisk (that’s where thickening happens).
- The simplest method for avoiding pudding skin is by covering the pudding with plastic wrap that’s pressed directly on the surface.
- To add even more gloss, stir the chocolate in off-heat until completely emulsified and shiny.
Storage and Freezing
Refrigerator:
Store covered (or with plastic wrap touching the surface) for up to 4 days.
Freezes:
Up to 1 month (texture may be slightly less silky upon thawing).
To serve / Thaw:
Thaw overnight in the refrigerator. Stir gently before serving.
Recipe Variations
Mocha:
Slightly increase the heat to medium; whisk in 1 teaspoon instant espresso powder with the cocoa powder.
Orange chocolate:
Stir in 1/2 teaspoon orange zest after cooking.
Sweeter:
Use 60–70% dark chocolate and decrease sugar amount by 1–2 tbsp (12–25 g), to taste.
Nut-free:
Leave out the walnuts; or sprinkle with chocolate curls.
Dairy-free:
Use full-fat oat milk + dairy free dark chocolate.
Serving suggestion:
Top with a spoonful of homemade whipped cream (add your internal link to your whipped cream post here).
Creamy Chocolate Pudding Cups (Easy & Rich)
Ingredients
Equipment
Method
- In a medium saucepan (off heat), whisk together the sugar, cornstarch, and cocoa powder.
- Slowly whisk in the milk until smooth.
- Cook over medium heat, whisking constantly, until thickened and gently bubbling. Whisk 30–60 seconds more for a smooth, glossy texture.
- Remove from heat and whisk in the dark chocolate until melted and fully smooth.
- Pour into 3 serving cups.
- Press plastic wrap directly onto the surface to prevent skin.
- Chill for about 2 hours, until set.
- Top with chopped walnuts (optional) and serve.
Nutrition
Video
Notes
- For the smoothest texture, add the milk slowly while whisking.
- If lumps form, strain through a fine-mesh sieve before chilling.
- Milk swap: 2% works; for dairy-free use full-fat oat milk (set may be softer).
- Chocolate swap: use 60–70% for a less sweet flavor, or semi-sweet for a sweeter pudding.
Tried this recipe?
Let us know how it was!FAQs
Why didn’t my pudding thicken?
Most of the time it just requires a little more, at a low simmer. Cornstarch thickens when it heats — keep whisking, until the starch begins to simmer and becomes shiny and thick.
Can I use flour instead of cornstarch?
You can, but it won’t be quite as silky. Cornstarch provides that old-school, smooth, clean pudding set.
How do I prevent lumps?
Combine dry ingredients then add milk slowly and whisk constantly while cooking. Strain, if desired (use a fine-mesh sieve).
Can I make it less sweet?
Yes—use dark chocolate (60–70% cocoa content) and reduce the sugar by 1–2 tablespoons (12–25 g).
Does chocolate percentage matter?
Yes. Higher cacao = less sweet and more bitter chocolate flavor. For an even (classic) pudding taste, aim for around 55 percent.
Can I serve it warm?
Yes, but it will be looser. For neat pudding cups, refrigerate until chilled and fully set.